更好的执行 js 脚本
我们可以用外部库 actions/github-script(外部链接)
它有一些更高级的功能.
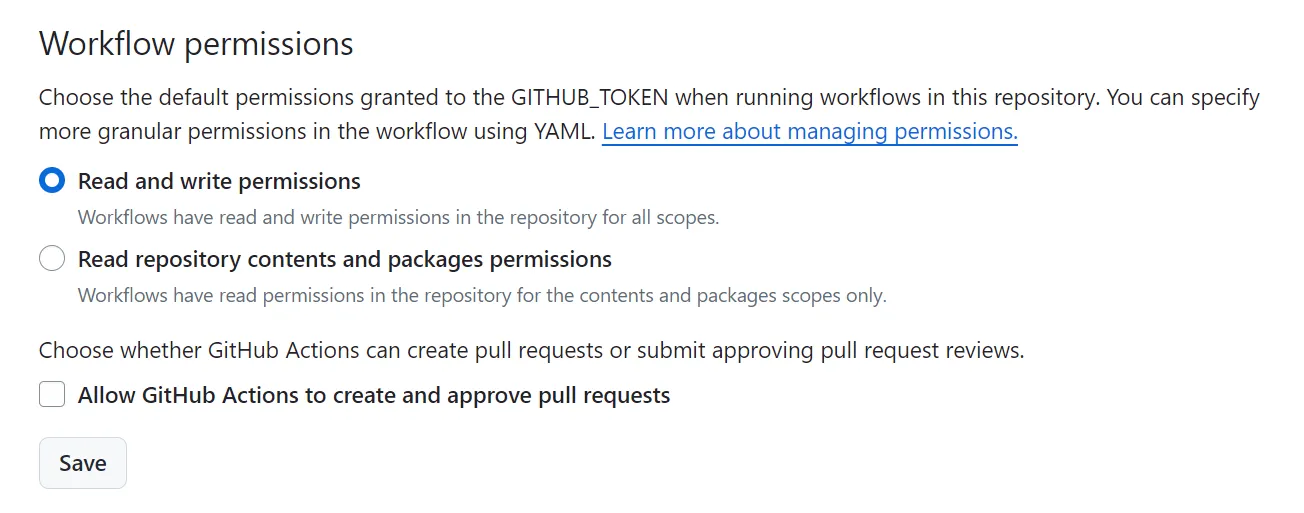
库内读写权限
不过在使用一些功能前, 我们需要更改GitHub actions 的权限, 从只读变为可写
如下所示

概述
这个库有优点也有缺点, 优点就是它先天的提供了一些可用函数, 方法, 变量, 不需要我们手动加载一些库或环境, 并将很多常用操作封装好了, 我们可用快捷地一键套用.
而缺点则是它是直接从 yaml 加载的脚本, 不能从文件加载(不过可在 script 中 require 其它 js ), 编辑时没有语法高亮, 最后, 报错信息比较模糊, 不利于 debug.
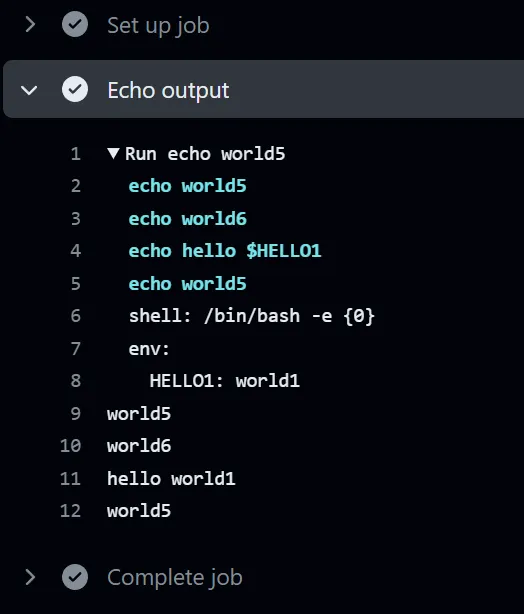
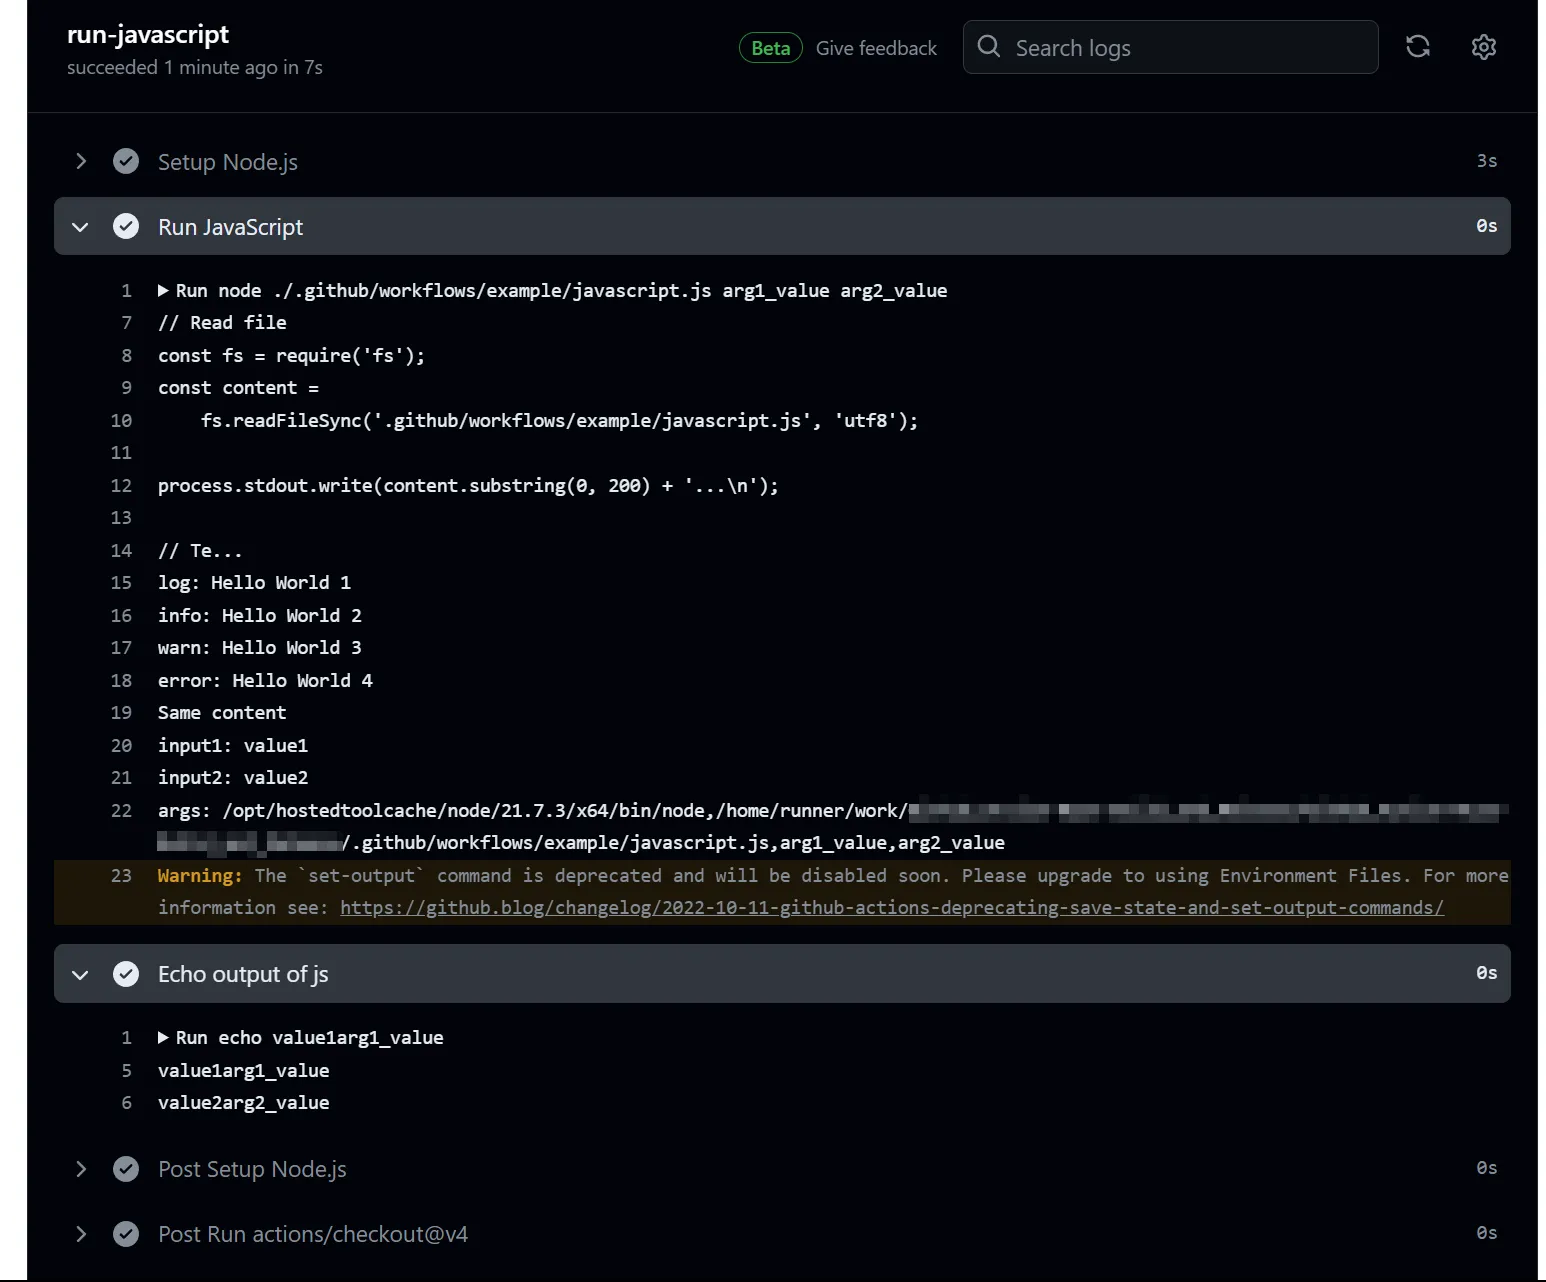
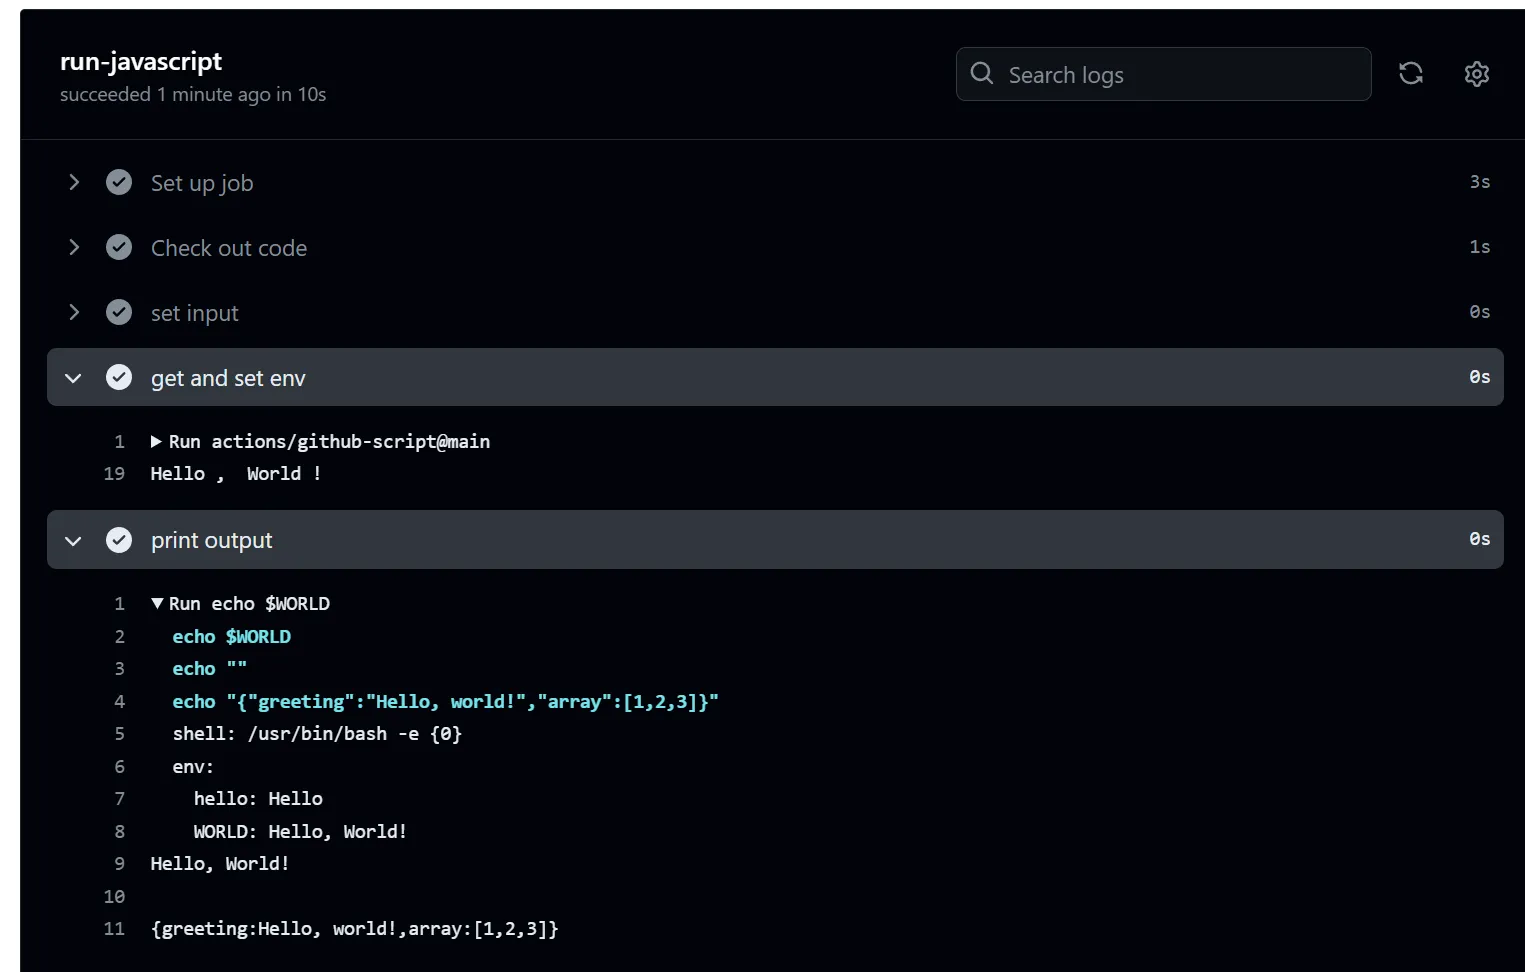
输入输出
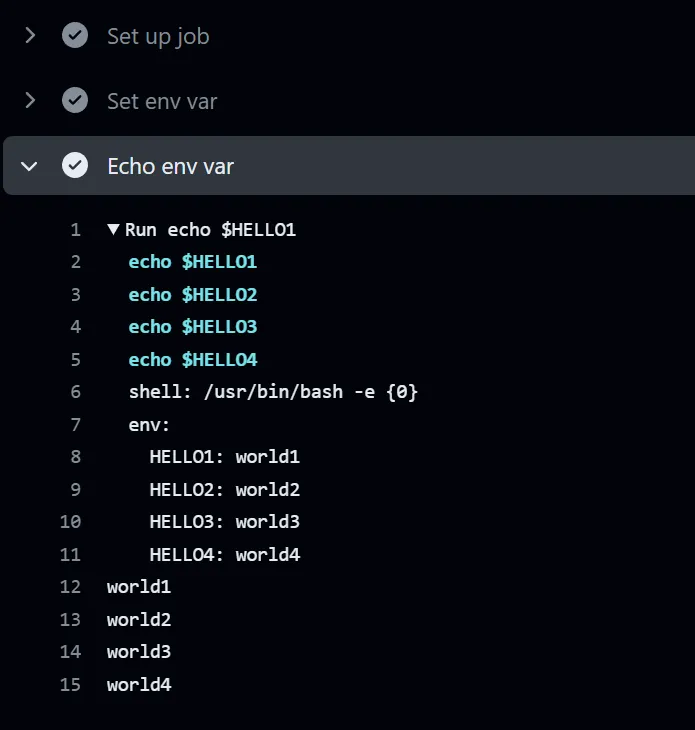
有多种形式提供输入, 一种是设置环境变量, 使用 process.env.NAME 调用, 一种是使用 ${{ steps.step-id.outputs.NAME }} 作为文本直接嵌入, 最后是设置在 input 里使用 core.getInput(NAME) 获取 yaml 的 input 的输入
输出也有许多形式, 最简单的是 return 返回一个值. 我们可以设置 result-encoding 为 string 或 json, 然后通过 ${{ steps.step-id.outputs.result }} 来访问返回的结果; 如果我们设置为 json, 这个 json 对象不可以通过 ${{ steps.step-id.outputs.result.key }} 来访问 key 对应的 value, 还是只能用 ${{ steps.step-id.outputs.result }} 获取整个 json .
此外, core.exportVariable('NAME', value) 可以将值写入环境变量, 后续可用从环境变量中直接获取此结果.
示例如下:
# input and output
- name: set input
  id: set-input
  run: |
    echo 'hello=Hello' > $GITHUB_ENV
    echo 'world=World' > $GITHUB_OUTPUT
- name: get and set env
  id: get-and-set-env
  uses: actions/github-script@main
  env:
    COMMA: ', '
  with:
    script: |
      const hello = process.env.hello
      const world = "${{ steps.set-input.outputs.world }}"
      const comma = process.env.COMMA
      console.log(hello, comma, world, '!')
      core.exportVariable('WORLD', hello + comma + world + '!')
      return { greeting: hello + comma + 'world!', array: [1, 2, 3]}
    result-encoding: json
- name: print output
  run: |
    echo $WORLD
    echo "${{ steps.get-and-set-env.outputs.result.greeting }}"
    echo "${{ steps.get-and-set-env.outputs.result }}"
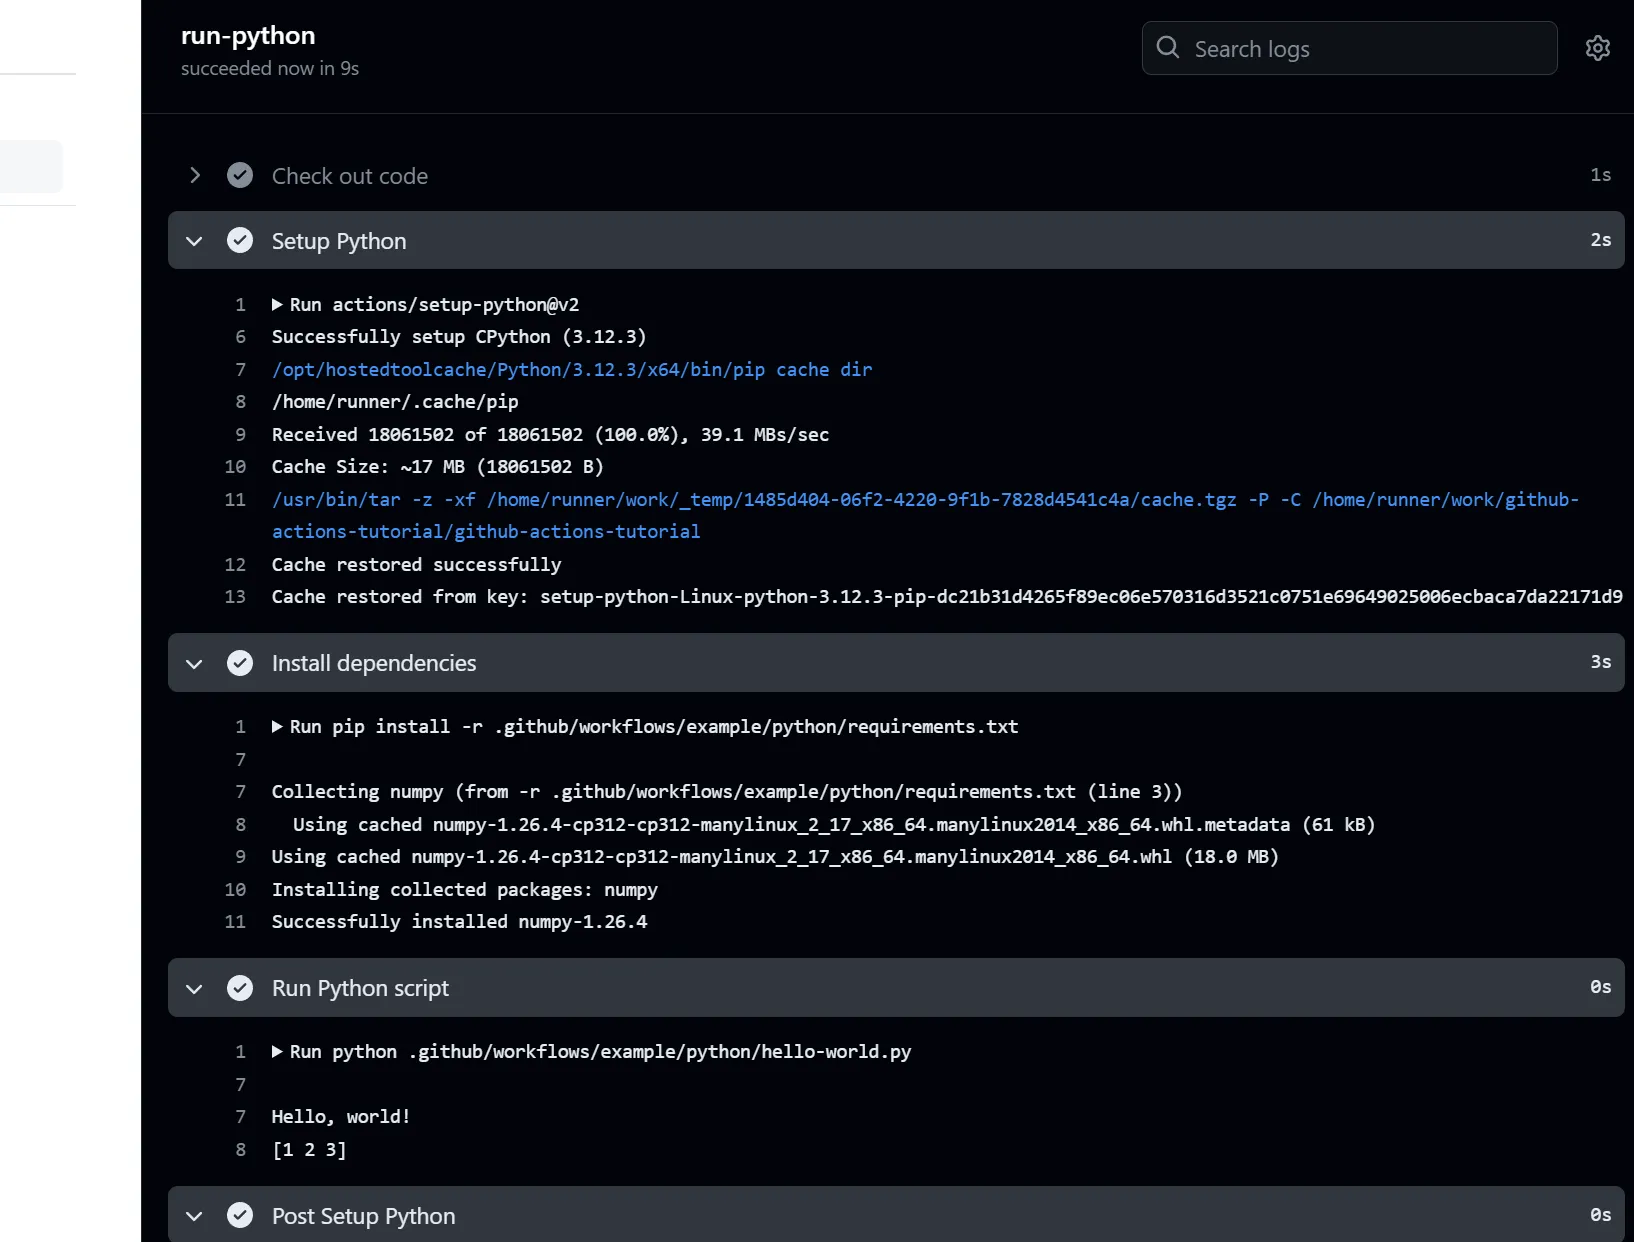
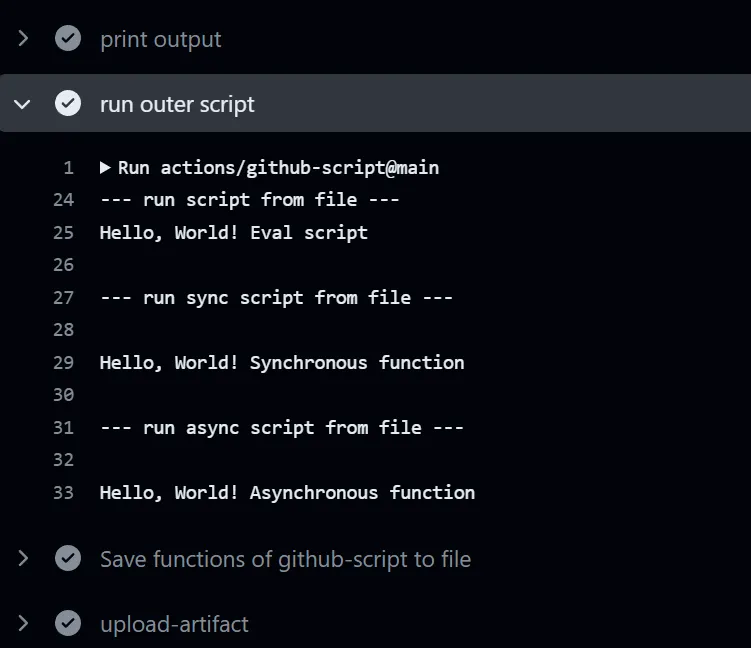
从文件运行 js
前文提到, 在 yaml 中编辑 js 很容易出错, 因此我们可以在其它文件中写好, 然后在yaml中引入的方式运行.
而这个库 actions/github-script 不能直接运行文件, 因此需要我们手动导入. 方法有三种.
最简单的就是构造一个函数, 然后运行它, 格式为 Function('param-Name-1', 'param-Name-2', ..., 'scripts')(p1, p2, ...), 其中 Function 通过 script 文本构造一个函数, 该函数的输入参数列表直接写在前面, 然后我们在Function后面输入参数调用这个函数, 实现运行的效果.
更好更安全的方法是利用 require('path/to/script.js')(params, ...) , 而在外部文件中使用 module.exports = (params, ...)=>{scripts} 的方式导出这个函数供我们 require 使用.
如果导出的是 async 函数, 我们使用 await require('$$path/to/script.js')(params, ...) 的方式直接运行即可. (在外部文件中使用 module.exports = async (params, ...)=>{scripts} 的方式导出异步函数)
代码片段如下:
const fs = require('fs')
const script = fs.readFileSync('.github/workflows/example/hello-world.js')
const text = "Eval script"
Function('text', script)(text);

const script_sync = require('.github/workflows/example/hello-world-sync.js')
script_sync(github, context, core, "Synchronous function")

const script_async = require('.github/workflows/example/hello-world-async.js')
await script_async(github, context, core, "Asynchronous function")
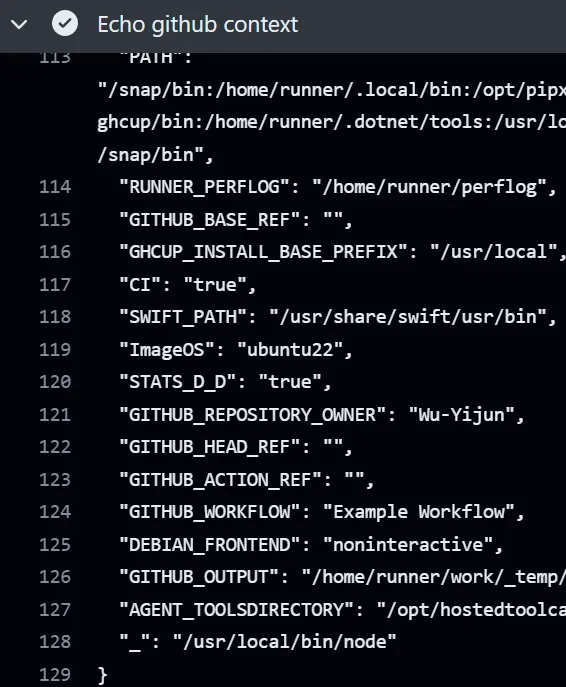
观察上下文中有哪些变量
主要就是方便我们观察和使用, 把所有的变量打印出来保存到文件里
使用 util.inspect 以获取当前变量的详细内容(类似于 console.log 的结果), 然后保存到workflow的附件中.
# save context to file
- name: Save functions of github-script to file
  uses: actions/github-script@main
  with:
    script: |
      const fs = require('fs')
      const util = require('util');
      fs.writeFileSync('github-script-context.txt', 'this = ' + util.inspect(this) + '\n\n')
      fs.appendFileSync('github-script-context.txt', 'github = ' + util.inspect(github) + '\n\n')
      fs.appendFileSync('github-script-context.txt', 'context = ' + util.inspect(context) + '\n\n')
      fs.appendFileSync('github-script-context.txt', 'core = ' + util.inspect(core) + '\n\n')
      fs.appendFileSync('github-script-context.txt', 'glob = ' + util.inspect(glob) + '\n\n')
      fs.appendFileSync('github-script-context.txt', 'io = ' + util.inspect(io) + '\n\n')
      fs.appendFileSync('github-script-context.txt', 'exec = ' + util.inspect(exec) + '\n\n')
      fs.appendFileSync('github-script-context.txt', 'require = ' + util.inspect(require) + '\n\n')
      process.env['INPUT_GITHUB-TOKEN'] = '***'
      process.env['ACTIONS_RUNTIME_TOKEN'] = '***'
      fs.appendFileSync('github-script-context.txt', 'process = ' + util.inspect(process) + '\n\n')
      fs.appendFileSync('github-script-context.txt', 'global = ' + util.inspect(global) + '\n\n')
- name: upload-artifact
  uses: actions/upload-artifact@main
  with:
    name: github-script-context
    path: github-script-context.txt
结果:
github-script-context.txt
this = <ref *1> Object [global] {
  global: [Circular *1],
  clearImmediate: [Function: clearImmediate],
  setImmediate: [Function: setImmediate] {
    [Symbol(nodejs.util.promisify.custom)]: [Getter]
  },
  clearInterval: [Function: clearInterval],
  clearTimeout: [Function: clearTimeout],
  setInterval: [Function: setInterval],
  setTimeout: [Function: setTimeout] {
    [Symbol(nodejs.util.promisify.custom)]: [Getter]
  },
  queueMicrotask: [Function: queueMicrotask],
  structuredClone: [Function: structuredClone],
  atob: [Getter/Setter],
  btoa: [Getter/Setter],
  performance: [Getter/Setter],
  fetch: [AsyncFunction: fetch],
  crypto: [Getter]
}

github = <ref *1> NewOctokit {
  request: [Function: newApi] {
    endpoint: [Function: bound endpointWithDefaults] {
      DEFAULTS: [Object],
      defaults: [Function: bound withDefaults],
      merge: [Function: bound merge],
      parse: [Function: parse]
    },
    defaults: [Function: bound withDefaults]
  },
  graphql: [Function: newApi] {
    defaults: [Function: bound withDefaults],
    endpoint: [Function: bound endpointWithDefaults] {
      DEFAULTS: [Object],
      defaults: [Function: bound withDefaults],
      merge: [Function: bound merge],
      parse: [Function: parse]
    }
  },
  log: {
    debug: [Function: debug],
    info: [Function: info],
    warn: [Function: bound warn],
    error: [Function: bound error]
  },
  hook: [Function: bound register] {
    api: {
      remove: [Function: bound removeHook],
      before: [Function: bound addHook],
      error: [Function: bound addHook],
      after: [Function: bound addHook],
      wrap: [Function: bound addHook]
    },
    remove: [Function: bound removeHook],
    before: [Function: bound addHook],
    error: [Function: bound addHook],
    after: [Function: bound addHook],
    wrap: [Function: bound addHook]
  },
  auth: [Function: bound auth] AsyncFunction {
    hook: [Function: bound hook] AsyncFunction
  },
  rest: {
    actions: { octokit: [Circular *1], scope: 'actions', cache: {} },
    activity: { octokit: [Circular *1], scope: 'activity', cache: {} },
    apps: { octokit: [Circular *1], scope: 'apps', cache: {} },
    billing: { octokit: [Circular *1], scope: 'billing', cache: {} },

......
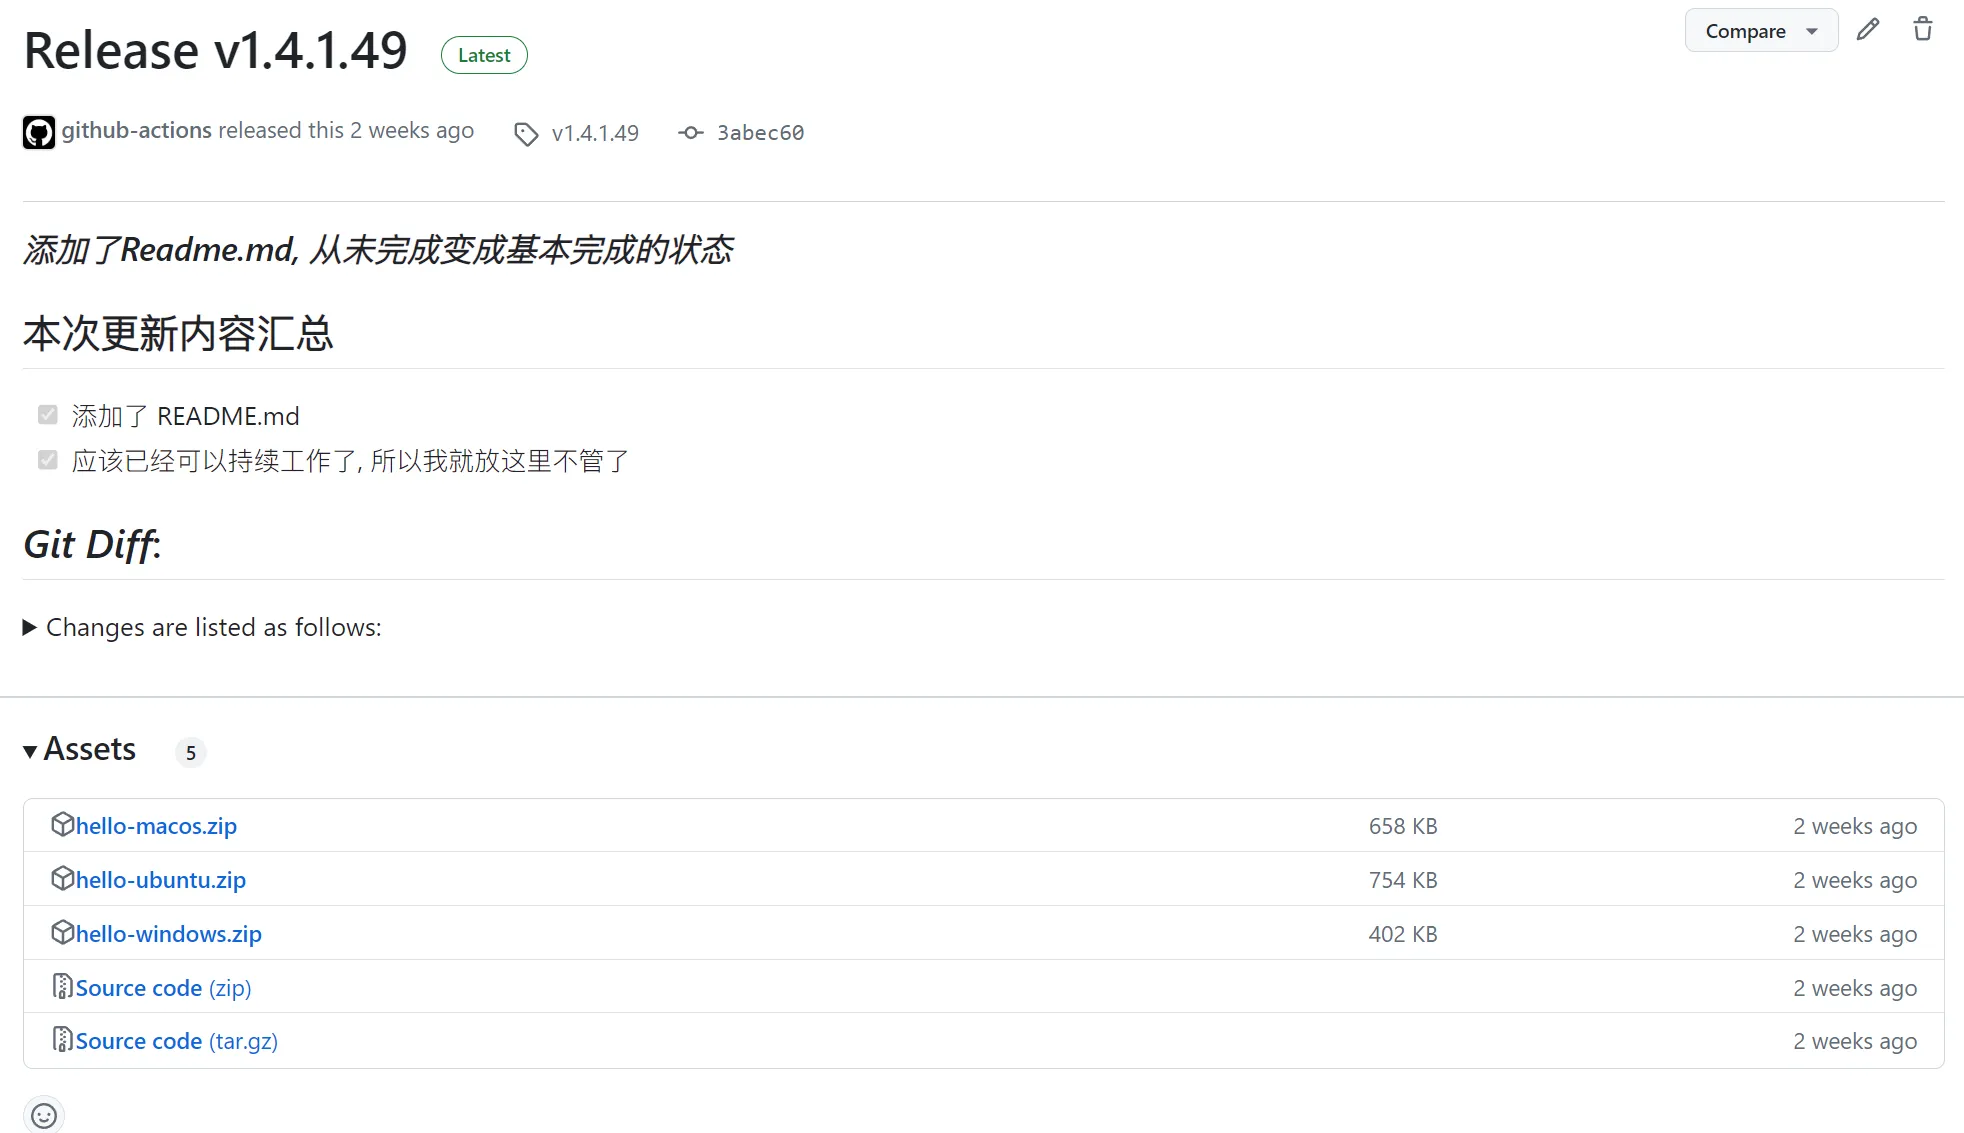
js 中使用 REST API
Octokit 和 REST Api 才是这个库的核心所在.
通常情况下, 我们使用 Octokit 是需要先获取授权的 (Oauth) , 而这个授权需要使用 token, 很容易出现奇奇怪怪的问题导致授权失败.
而这个库给出的变量 github 是已经预先完成授权的 Octokit, 因此我们可以直接调用 github.request() 来访问 Github Api.
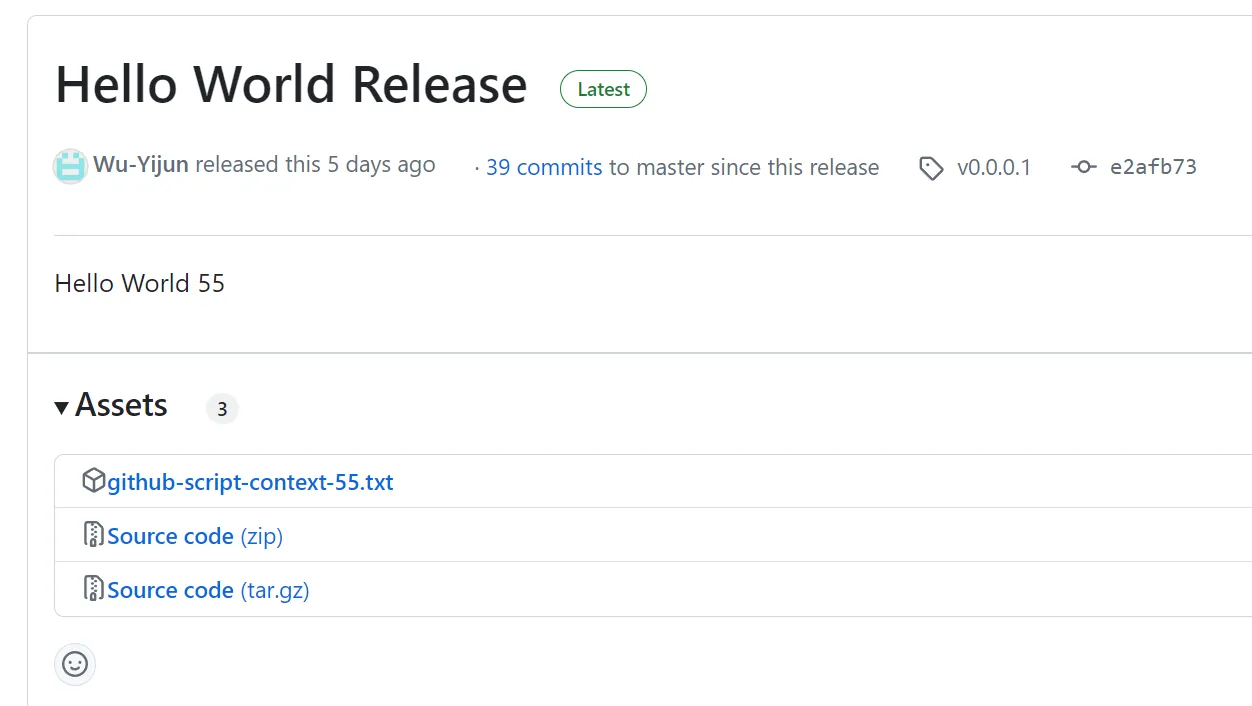
比如这个示例我们先获取最新的 release, 得到它的 id. 然后再更新这个 release 的正文, 为 Hello World + 运行次数.
const response = await github.request('GET /repos/{owner}/{repo}/releases/latest', {
  owner: context.repo.owner,
  repo: context.repo.repo,
})
const release = response.data
const result = await github.request('PATCH /repos/{owner}/{repo}/releases/{release_id}', {
  owner: context.repo.owner,
  repo: context.repo.repo,
  release_id: release.id,
  tag_name: 'v0.0.0.1',
  name: 'Hello World Release',
  body: 'Hello World ' + context.runNumber,
})
此外, github 还封装了不少可以直接用的操作在 github.rest 内, 比如 github.rest.issues.get, github.repos.uploadReleaseAsset 等等(全部列表可参见 octokit/rest.js(外部链接)), 可以简化调用:
github.rest.repos.uploadReleaseAsset({
  owner: context.repo.owner,
  repo: context.repo.repo,
  release_id: process.env.RELEASE,
  name: 'github-script-context-' + context.runNumber + '.txt',
  data: fs.readFileSync('github-script-context.txt'),
})
注意: github.rest.name.fun({}) 的返回结果是 Promise(<response>) , 如果需要获取返回结果请多加一个 await.
更多关于 Github REST 的用法 见正文独立章节
全部源码
.github/workflows/example-javascript-advanced.yaml
name: Example - Run Javascript Advanced

on:
  push:
  workflow_dispatch:

jobs:
  run-javascript:
    runs-on: ubuntu-latest
    # runs-on: self-hosted
    steps:
      - name: Check out code
        uses: actions/checkout@main

      # input and output
      - name: set input
        id: set-input
        run: |
          echo 'hello=Hello' > $GITHUB_ENV
          echo 'world=World' > $GITHUB_OUTPUT
      - name: get and set env
        id: get-and-set-env
        uses: actions/github-script@main
        env:
          COMMA: ', '
        with:
          script: |
            const hello = process.env.hello
            const world = "${{ steps.set-input.outputs.world }}"
            const comma = process.env.COMMA
            console.log(hello, comma, world, '!')
            core.exportVariable('WORLD', hello + comma + world + '!')
            return { greeting: hello + comma + 'world!', array: [1, 2, 3]}
          result-encoding: json
      - name: print output
        run: |
          echo $WORLD
          echo "${{ steps.get-and-set-env.outputs.result.greeting }}"
          echo "${{ steps.get-and-set-env.outputs.result }}"

      # run script from file
      - name: run outer script
        uses: actions/github-script@main
        with:
          script: |
            console.log('--- run script from file ---');
            const fs = require('fs')
            const script = fs.readFileSync('.github/workflows/example/hello-world.js')
            const text = "Eval script"
            Function('text', script)(text);
            console.log('\n--- run sync script from file ---\n');
            const script_sync = require('.github/workflows/example/hello-world-sync.js')
            script_sync(github, context, core, "Synchronous function")
            console.log('\n--- run async script from file ---\n');
            const script_async = require('.github/workflows/example/hello-world-async.js')
            await script_async(github, context, core, "Asynchronous function")

      # save context to file
      - name: Save functions of github-script to file
        uses: actions/github-script@main
        with:
          script: |
            const fs = require('fs')
            const util = require('util');
            fs.writeFileSync('github-script-context.txt', 'this = ' + util.inspect(this) + '\n\n')
            fs.appendFileSync('github-script-context.txt', 'github = ' + util.inspect(github) + '\n\n')
            fs.appendFileSync('github-script-context.txt', 'context = ' + util.inspect(context) + '\n\n')
            fs.appendFileSync('github-script-context.txt', 'core = ' + util.inspect(core) + '\n\n')
            fs.appendFileSync('github-script-context.txt', 'glob = ' + util.inspect(glob) + '\n\n')
            fs.appendFileSync('github-script-context.txt', 'io = ' + util.inspect(io) + '\n\n')
            fs.appendFileSync('github-script-context.txt', 'exec = ' + util.inspect(exec) + '\n\n')
            fs.appendFileSync('github-script-context.txt', 'require = ' + util.inspect(require) + '\n\n')
            process.env['INPUT_GITHUB-TOKEN'] = '***'
            process.env['ACTIONS_RUNTIME_TOKEN'] = '***'
            fs.appendFileSync('github-script-context.txt', 'process = ' + util.inspect(process) + '\n\n')
            fs.appendFileSync('github-script-context.txt', 'global = ' + util.inspect(global) + '\n\n')
      - name: upload-artifact
        uses: actions/upload-artifact@main
        with:
          name: github-script-context
          path: github-script-context.txt

      # use REST Api to set latest release to hello world + runNumber
      - name: Use REST Api to set latest release to hello world
        uses: actions/github-script@main
        with:
          script: |
            const response = await github.request('GET /repos/{owner}/{repo}/releases/latest', {
              owner: context.repo.owner,
              repo: context.repo.repo,
            })
            console.log(response.data)
            const release = response.data
            const result = await github.request('PATCH /repos/{owner}/{repo}/releases/{release_id}', {
              owner: context.repo.owner,
              repo: context.repo.repo,
              release_id: release.id,
              tag_name: 'v0.0.0.1',
              name: 'Hello World Release',
              body: 'Hello World ' + context.runNumber,
            })
            console.log(result.data)
            core.exportVariable('RELEASE', release.id)
      - name: Use REST Api to upload assets to release
        uses: actions/github-script@main
        with:
          script: |
            // listReleaseAssets
            const ids = await github.rest.repos.listReleaseAssets({
              owner: context.repo.owner,
              repo: context.repo.repo,
              release_id: process.env.RELEASE,
            });
            // deleteReleaseAsset
            for (const id of ids.data) {
              github.rest.repos.deleteReleaseAsset({
                owner: context.repo.owner,
                repo: context.repo.repo,
                asset_id: id.id,
              });
            }
            // uploadReleaseAsset
            const fs = require('fs')
            github.rest.repos.uploadReleaseAsset({
              owner: context.repo.owner,
              repo: context.repo.repo,
              release_id: process.env.RELEASE,
              name: `github-script-context-${context.runNumber}.txt`,
              data: fs.readFileSync('github-script-context.txt'),
            })
.github/workflows/example/hello-world.js
console.log('Hello, World!', text)
.github/workflows/example/hello-world-sync.js
module.exports = (github, context, core, text) => {
  console.log('Hello, World!', text)
}
.github/workflows/example/hello-world-async.js
module.exports = async (github, context, core, text) => {
  // wait for 1 second
  await new Promise(resolve => setTimeout(resolve, 1000))
      .then(() => {console.log('Hello, World!', text)})
}